
How to deploy your website through Firebase?

🌩️ Always staying at the forefront of technological advancements and pushing the boundaries of innovation.
Join me in shaping the future of intelligent and scalable applications, unlocking data's full potential 🚀.
Why use Firebase?
Firebase hosting is not only a free service, but it is also a simple way to host, as it includes an SSL certificate by default, ensuring that your website is hosted securely with HTTPS.
Many hosting servers are paid and have slow speeds. However, Firebase hosting will provide you with impressively fast speeds across many locations without the need for a separate CDN.
We needed the following for configuration or hosting:
- Google Account: Create a Firebase account in the console.
- Domain Specifics: You can map your hosting service to the domain. There are many providers available, and you can buy a domain from any of them.
- Firebase-CLI: Use the npm command below to install Firebase-CLI.
npm install -g firebase-tools or yarn global add firebase-tools
Create a Project
We need to click on "Go to console" in the top right corner. Now, we gonna create a project by clicking in
create a new project.
 Now, we chose the name of the project and keep on!
 Here you can disable google analytics, for now, and then the project is finally created!

Now follow the steps to Deploy your Website
We gonna create a folder and a simple HTML:
$ mkdir firebase-lab-website
Look at our simple HTML in the folder:
firebase-lab-website/index.html
<!DOCTYPE html>
<html lang="en">
  <head>
    <meta charset="UTF-8">
    <meta name="viewport" content="width=device-width, initial-scale=1.0">
    <title>Firebase Lab</title>
  </head>
  <body>
    <h1>Firebase Lab</h1>
  </body>
</html>
Now, we need to install the CLI of the firebase with the command below:
$ npm install -g firebase-tools
Now, we need login:
$ firebase login
After that, execute this command in the website directory and choose the right project:
$ firebase init
First, use the space bar to select "Hosting: Configure and deploy Firebase Hosting sites" and then press Enter.
Second, press Enter to select "Use an existing project."
Third, select the project that you created.
Fourth, navigate to your index.html folder. The default is "public," but in my case, it's "./".
Last, we need to say if your website is a single-page app.
Everything is in place! The final command in the directory is to deploy:
$ firebase deploy
Our website is online!!
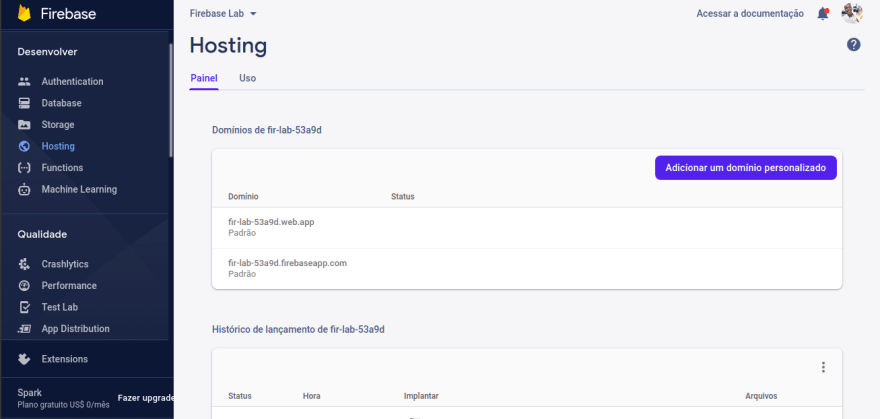
You can see details of the deploy in the option "Hosting" at the left menu:
If you find this informative, share it with your friends and try to give feedback. Meet you in the next blog post! 👋


